Self-parking car using genetic algorithm (2021)
In this article, we'll train the car to do self-parking using a genetic algorithm.
以下正文同步自 Hacker News,版权归原站所有,已转换为易读排版。
In this article, we'll train the car to do self-parking using a genetic algorithm.
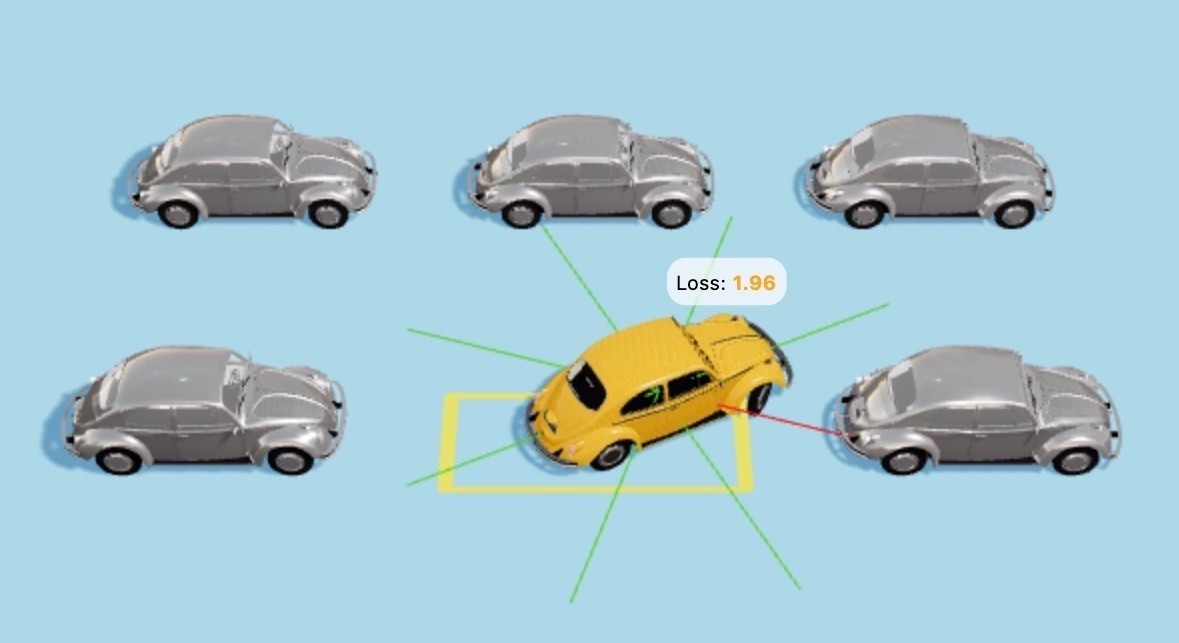
We'll create the 1st generation of cars with random genomes that will behave something like this:
On the ≈40th generation the cars start learning what the self-parking is and start getting closer to the parking spot:
Another example with a bit more challenging starting point:
Yeah-yeah, the cars are hitting some other cars along the way, and also are not perfectly fitting the parking spot, but this is only the 40th generation since the creation of the world for them, so be merciful and give the cars some space to grow :D
You may launch the 🚕 Self-parking Car Evolution Simulator to see the evolution process directly in your browser. The simulator gives you the following opportunities:
The genetic algorithm for this project is implemented in TypeScript. The full genetic source code will be shown in this article, but you may also find the final code examples in the Evolution Simulator repository.
We're going to use a genetic algorithm for the particular task of evolving cars' genomes. However, this article only touches on the basics of the algorithm and is by no means a complete guide to the genetic algorithm topic.
Having that said, let's deep dive into more details...
Step-by-step we're going to break down a high-level task of creating the self-parking car to the straightforward low-level optimization problem of finding the optimal combination of 180 bits (finding the optimal car genome).
To be able to move, the car would need "muscles". Let's give the car two types of muscles:
With these two muscles the car can perform the following movements:
In our case, the muscles are receivers of the signals that come from the brain once every 100ms (milliseconds). Based on the value of the brain's signal the muscles act differently. We'll cover the "brain" part below, but for now, let's say that our brain may send only 3 possible signals to each muscle: -1, 0, or +1.
type MuscleSignal = -1 | 0 | 1;
For example, the brain may send the signal with the value of +1 to the engine muscle and it will start moving the car forward. The signal -1 to the engine moves the car backward. At the same time, if the brain will send the signal of -1 to the steering wheel muscle, it will turn the car to the left, etc.
Here is how the brain signal values map to the muscle actions in our case:
You may use the Evolution Simulator and try to park the car manually to see how the car muscles work. Every time you press one of the WASD keyboard keys (or use a touch-screen joystick) you send these -1, 0, or +1 signals to the engine and steering wheel muscles.
Before our car will learn how to do self-parking using its muscles, it needs to be able to "see" the surroundings. Let's give it the 8 eyes in a form of distance sensors:
You may use the Evolution Simulator and see how the color of each sensor changes based on how close the obstacle is.
type Sensors = number[];
Giving the brain to the car
At this moment, our car can "see" and "move", but there is no "coordinator", that would transform the signals from the "eyes" to the proper movements of the "muscles". We need to give the car a "brain".
As an input from the sensors, every 100ms the brain will be getting 8 float numbers, each one in range of [0...4]. For example, the input might look like this:
const sensors: Sensors = [s0, s1, s2, s3, s4, s5, s6, s7]; // i.e. 🧠 ← [0, 0.5, 4, 0.002, 0, 3.76, 0, 1.245]
Brain output
Every 100ms the brain should produce two integers as an output:
Each number should be of the type MuscleSignal and might take one of three values: -1, 0, or +1.
Keeping in mind the brain's input and output mentioned above we may say that the brain is just a function:
const { engineSignal, wheelSignal } = brainToMuscleSignal( brainFunction(sensors) ); // i.e. { engineSignal: 0, wheelSignal: -1 } ← 🧠 ← [0, 0.5, 4, 0.002, 0, 3.76, 0, 1.245]
Where brainToMuscleSignal() is a function that converts raw brain signals (any float number) to muscle signals (to -1, 0, or +1 number) so that muscles could understand it. We'll implement this converter function below.
The main question now is what kind of a function the brainFunction() is.
To make the car smarter and its movements to be more sophisticated we could go with a Multilayer Perceptron. The name is a bit scary but this is a simple Neural Network with a basic architecture (think of it as a big formula with many parameters/coefficients).
I've covered Multilayer Perceptrons with a bit more details in my homemade-machine-learning, machine-learning-experiments, and nano-neuron projects. You may even challenge that simple network to recognize your written digits.
However, to avoid the introduction of a whole new concept of Neural Networks, we'll go with a much simpler approach and we'll use two Linear Polynomials with multiple variables (to be more precise, each polynomial will have exactly 8 variables, since we have 8 sensors) which will look something like this:
engineSignal = brainToMuscleSignal( (e0 * s0) + (e1 * s1) + ... + (e7 * s7) + e8 // <- brainFunction )
wheelSignal = brainToMuscleSignal( (w0 * s0) + (w1 * s1) + ... + (w7 * s7) + w8 // <- brainFunction )
Where:
The cost of using the simpler function for the brain will be that the car won't be able to learn some sophisticated moves and also won't be able to generalize well and adapt well to unknown surroundings. But for our particular parking lot and for the sake of demonstrating the work of a genetic algorithm it should still be enough.
We may implement the generic polynomial function in the following way:
type Coefficients = number[];
// Calculates the value of a linear polynomial based on the coefficients and variables. const linearPolynomial = (coefficients: Coefficients, variables: number[]): number => { if (coefficients.length !== (variables.length + 1)) { throw new Error('Incompatible number of polynomial coefficients and variables'); } let result = 0; coefficients.forEach((coefficient: number, coefficientIndex: number) => { if (coefficientIndex < variables.length) { result += coefficient * variables[coefficientIndex]; } else { // The last coefficient needs to be added up without multiplication. result += coefficient } }); return result; };
The car's brain in this case will consist of two polynomials and will look like this:
const engineSignal: MuscleSignal = brainToMuscleSignal( linearPolynomial(engineCoefficients, sensors) );
const wheelSignal: MuscleSignal = brainToMuscleSignal( linearPolynomial(wheelCoefficients, sensors) );
The output of a linearPolynomial() function is a float number. The brainToMuscleSignal() function need to convert the wide range of floats to three particular integers, and it will do it in two steps:
To do the first part of the conversion we need to introduce a Sigmoid Function which implements the following formula:
It converts the wide range of floats (the x axis) to float numbers with a limited range of (0...1) (the y axis). This is exactly what we need.
Here is how the conversion steps would look on the Sigmoid graph.
The implementation of two conversion steps mentioned above would look like this:
// Calculates the sigmoid value for a given number. const sigmoid = (x: number): number => { return 1 / (1 + Math.E ** -x); };
// Converts sigmoid value (0...1) to the muscle signals (-1, 0, +1) // The margin parameter is a value between 0 and 0.5: // [0 ... (0.5 - margin) ... 0.5 ... (0.5 + margin) ... 1] const sigmoidToMuscleSignal = (sigmoidValue: number, margin: number = 0.4): MuscleSignal => { if (sigmoidValue < (0.5 - margin)) { return -1; } if (sigmoidValue > (0.5 + margin)) { return 1; } return 0; };
// Converts raw brain signal to the muscle signal. const brainToMuscleSignal = (rawBrainSignal: number): MuscleSignal => { const normalizedBrainSignal = sigmoid(rawBrainSignal); return sigmoidToMuscleSignal(normalizedBrainSignal); }
Car's genome (DNA)
☝🏻 The main conclusion from the "Eyes", "Muscles" and "Brain" sections above should be this: the coefficients [e0, e1, ..., e8] and [w0, w1, ..., w8] defines the behavior of the car. These 18 numbers together form the unique car's Genome (or car's DNA).
Let's join the [e0, e1, ..., e8] and [w0, w1, ..., w8] brain coefficients together to form a car's genome in a decimal form:
// Car genome as a list of decimal numbers (coefficients). const carGenomeBase10 = [e0, e1, ..., e8, w0, w1, ..., w8];
// i.e. carGenomeBase10 = [17.5, 0.059, -46, 25, 156, -0.085, -0.207, -0.546, 0.071, -58, 41, 0.011, 252, -3.5, -0.017, 1.532, -360, 0.157]
Car genome in a binary form
Let's move one step deeper (to the level of the genes) and convert the decimal numbers of the car's genome to the binary format (to the plain 1s and 0s).
I've described in the detail the process of converting the floating-point numbers to binary numbers in the Binary representation of the floating-point numbers article. You might want to check it out if the code in this section is not clear.
Here is a quick example of how the floating-point number may be converted to the 16 bits binary number (again, feel free to read this first if the example is confusing):
In our case, to reduce the genome length, we will convert each floating coefficient to the non-standard 10 bits binary number (1 sign bit, 4 exponent bits, 5 fraction bits).
We have 18 coefficients in total, every coefficient will be converted to 10 bits number. It means that the car's genome will be an array of 0s and 1s with a length of 18 * 10 = 180 bits.
For example, for the genome in a decimal format that was mentioned above, its binary representation would look like this:
type Gene = 0 | 1;
type Genome = Gene[];
const genome: Genome = [ // Engine coefficients. 0, 1, 0, 1, 1, 0, 0, 0, 1, 1, // <- 17.5 0, 0, 0, 1, 0, 1, 1, 1, 0, 0, // <- 0.059 1, 1, 1, 0, 0, 0, 1, 1, 1, 0, // <- -46 0, 1, 0, 1, 1, 1, 0, 0, 1, 0, // <- 25 0, 1, 1, 1, 0, 0, 0, 1, 1, 1, // <- 156 1, 0, 0, 1, 1, 0, 1, 1, 0, 0, // <- -0.085 1, 0, 1, 0, 0, 1, 0, 1, 0, 1, // <- -0.207 1, 0, 1, 1, 0, 0, 0, 0, 1, 1, // <- -0.546 0, 0, 0, 1, 1, 0, 0, 1, 0, 0, // <- 0.071
// Wheels coefficients. 1, 1, 1, 0, 0, 1, 1, 0, 1, 0, // <- -58 0, 1, 1, 0, 0, 0, 1, 0, 0, 1, // <- 41 0, 0, 0, 0, 0, 0, 1, 0, 1, 0, // <- 0.011 0, 1, 1, 1, 0, 1, 1, 1, 1, 1, // <- 252 1, 1, 0, 0, 0, 1, 1, 0, 0, 0, // <- -3.5 1, 0, 0, 0, 1, 0, 0, 1, 0, 0, // <- -0.017 0, 0, 1, 1, 1, 1, 0, 0, 0, 1, // <- 1.532 1, 1, 1, 1, 1, 0, 1, 1, 0, 1, // <- -360 0, 0, 1, 0, 0, 0, 1, 0, 0, 0, // <- 0.157 ];
Oh my! The binary genome looks so cryptic. But can you imagine, that these 180 zeroes and ones alone define how the car behaves in the parking lot! It's like you hacked someone's DNA and know what each gene means exactly. Amazing!
By the way, you may see the exact values of genomes and coefficients for the best performing car on the Evolution Simulator dashboard:
Here is the source code that performs the conversion from binary to decimal format for the floating-point numbers (the brain will need it to decode the genome and to produce the muscle signals based on the genome data):
type Bit = 0 | 1;
type Bits = Bit[];
type PrecisionConfig = { signBitsCount: number, exponentBitsCount: number, fractionBitsCount: number, totalBitsCount: number, };
type PrecisionConfigs = { custom: PrecisionConfig, };
const precisionConfigs: PrecisionConfigs = { // Custom-made 10-bits precision for faster evolution progress. custom: { signBitsCount: 1, exponentBitsCount: 4, fractionBitsCount: 5, totalBitsCount: 10, }, };
// Converts the binary representation of the floating-point number to decimal float number. function bitsToFloat(bits: Bits, precisionConfig: PrecisionConfig): number { const { sig
正文由 探How 从来源站点 RSS 同步,内容未经改写;遇到排版缺失或需要图片、视频时请以原文为准。