Deploy a Django app with PostgreSQL for free, with VS Code in the browser
Put a Django project online on its own HTTPS address, with a real PostgreSQL database and VS Code in the browser beside it, on the free plan. About a minute from signing in to a running app, with the database connected …
以下正文同步自 Hacker News 最新,版权归原站所有,已转换为易读排版。
Put a Django project online on its own HTTPS address, with a real PostgreSQL database and VS Code in the browser beside it, on the free plan. About a minute from signing in to a running app, with the database connected and the admin login working from the start.
The free plan (Spark) runs one app with one database. No card needed.
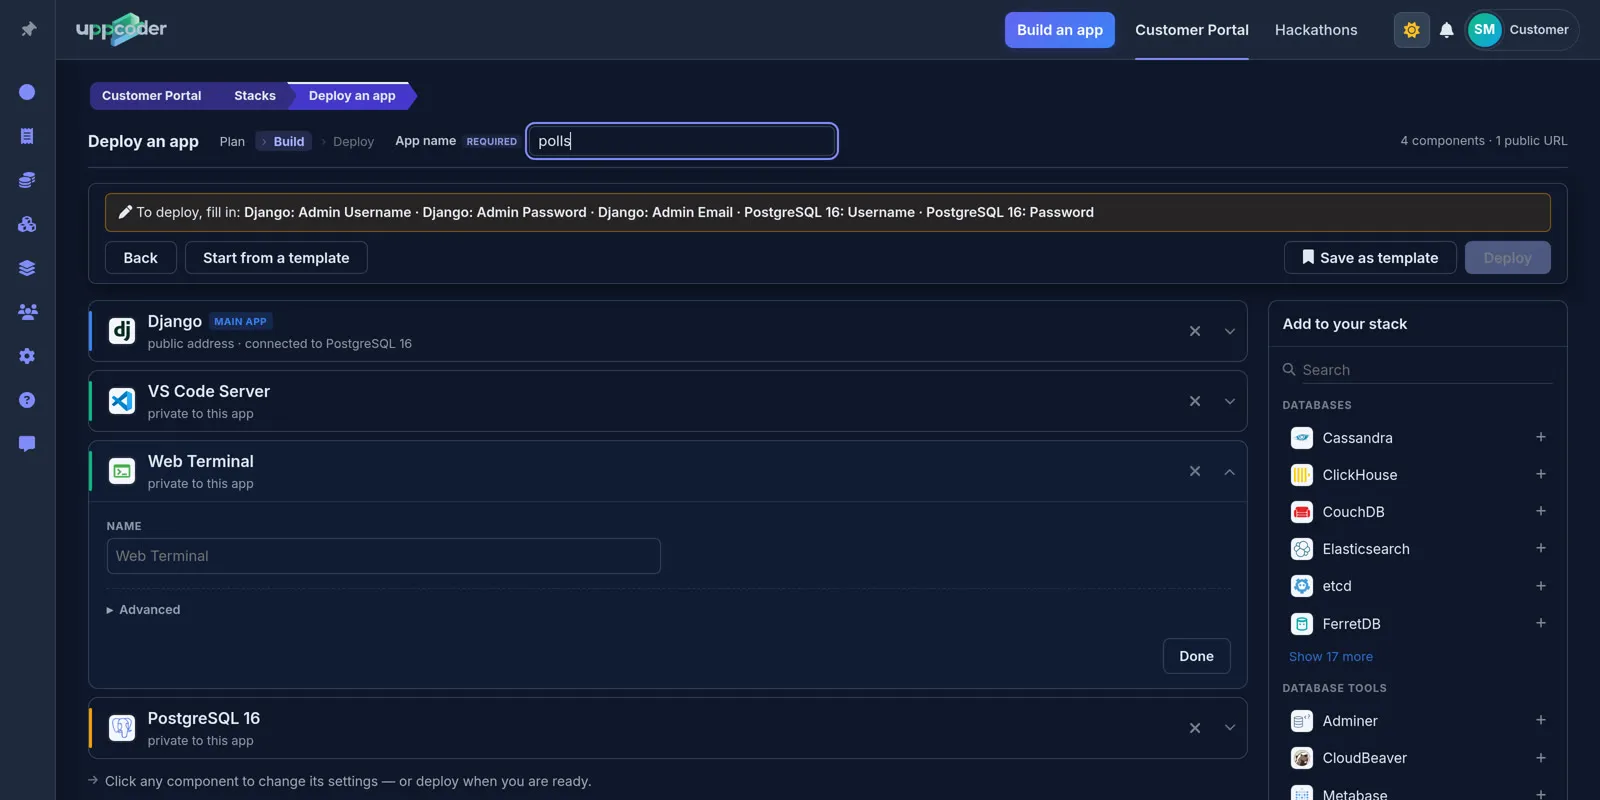
Stacks, Create, Blank stack. Type "django" in the search box and pick Django, then search for PostgreSQL and add it: it is connected to the app automatically. Give the app a name; the yellow bar says what is still missing. On the Django card, fill in an admin username, password and email. VS Code, Terminal, Files and SSH are ticked by default. Under Database, leave "Connect the app to PostgreSQL 16" ticked, or untick it to develop on Django's default database first and connect it yourself later. Give PostgreSQL a username and password; the database name is filled in for you.
Press Deploy, check the summary, then Confirm and deploy. Ours was live in 33 seconds. The stack page has everything in one place: the app's address, VS Code, the web terminal and the database. Open the address and Django's welcome page is there.
With the box ticked, Uppcoder finishes the setup about half a minute after the deploy: it installs the PostgreSQL driver (psycopg), points DATABASES in mysite/settings.py at the database, runs migrate, creates the admin user from the username and password you typed, and adds the app's own address to CSRF_TRUSTED_ORIGINS so Django's forms work behind HTTPS. The values come from the app's environment, so no password sits in the code; the same details are under Connection details on the stack page. Open /admin/ on the app's address and sign in.
DATABASES = { 'default': { 'ENGINE': 'django.db.backends.postgresql', 'NAME': os.environ['POSTGRES_DB'], 'USER': os.environ['POSTGRES_USER'], 'PASSWORD': os.environ['POSTGRES_PASSWORD'], 'HOST': os.environ['POSTGRES_HOST'], 'PORT': os.environ.get('POSTGRES_PORT', '5432'), } }
CSRF_TRUSTED_ORIGINS = [os.environ['UPPCODER_SELF_URL']] if os.environ.get('UPPCODER_SELF_URL') else []
Connection details for the database, password hidden
The Django admin, signed in, running on PostgreSQL
If you unticked the box
The app starts on Django's default database and the PostgreSQL driver is already installed, so connecting later takes two steps: put the DATABASES block above into settings.py, then run these in the web terminal. createsuperuser --noinput uses the admin username, password and email you typed when you created the app. If a typo in settings.py stops the app, fix the file and press Restart on the stack page.
pixi run -e web-django python manage.py migrate pixi run -e web-django python manage.py createsuperuser --noinput
Bring your own code
On the stack page, the Django card has No repository, Connect: paste the repository's https address (GitHub, GitLab, Bitbucket or any other git host), pick the branch, and add an access token if it is private. It is cloned into the app and the app restarts on it; Pull brings in new commits later. Uppcoder leaves your own code as it is, so give the project the same two settings as above, list psycopg in its dependencies, and run migrate once in the web terminal.
When you want other people to see it, switch Private to Public at the top of the stack page. It changes at once, with no restart, and anyone with the link can open the app. VS Code, the terminal and the files always stay behind your login. Prefer your own editor? The stack page also shows how to connect over SSH from VS Code Remote, Cursor, JetBrains Gateway or Zed.
Django, its database and an editor, live in a minute, on the free plan.
正文由 探How 从来源站点 RSS 同步,内容未经改写;遇到排版缺失或需要图片、视频时请以原文为准。